DIY USB Rubber Ducky with Raspberry Pi Pico
Overview
This project demonstrates how to create a USB Rubber Ducky using a Raspberry Pi Pico as a keyboard HID (Human Interface Device). The device can execute custom scripts for penetration testing, automating tasks, and ethical hacking. It supports French (FR) and US keyboard layouts, along with a custom scripting syntax.
Features:
- Raspberry Pi Pico as a USB HID Keyboard
- Custom scripting engine for executing payloads
- Support for multiple keyboard layouts (FR, US)
- Python-based execution engine
- Adafruit HID library support
Hardware Requirements
- Raspberry Pi Pico
- USB cable
- Computer for writing and running scripts
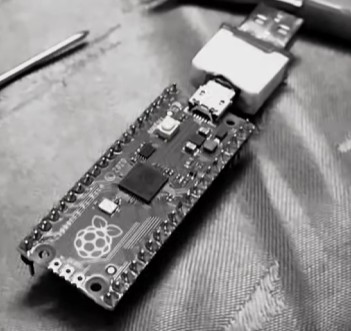
Device Image
Software Implementation
1. Setting Up the Raspberry Pi Pico
- Download and install MicroPython firmware on your Raspberry Pi Pico.
- Use Thonny IDE or another Python editor to upload scripts.
- Install Adafruit HID library to handle keyboard emulation.
2. Writing Payloads
The scripting syntax allows you to define keystrokes, delays, and commands, similar to traditional USB Rubber Ducky payloads. Example syntax:
1
2
3
WAIT 1000
WRITE Hello, World!
ENTER
3. Executing the Script
- Write the payload script.
- Upload it to the Raspberry Pi Pico.
- Plug the device into a target machine, and it will execute the keystrokes automatically.
4. Engine Code Source (github project soon)
1
2
3
4
5
6
7
8
9
10
11
12
13
14
15
16
17
18
19
20
21
22
23
24
25
26
27
28
29
30
31
32
33
34
35
36
37
38
39
40
41
42
43
44
45
46
47
48
49
50
51
52
53
54
55
56
57
58
59
60
61
62
63
64
65
66
67
68
69
70
71
72
73
74
75
76
77
78
79
80
81
82
83
84
85
86
87
88
89
90
91
92
93
94
95
96
import digitalio, storage, board, time, usb_hid
from adafruit_hid.keyboard import Keyboard
from adafruit_hid.keycode import Keycode
from adafruit_hid.keyboard_layout_us import KeyboardLayoutUS
from keyboard_layout_win_fr import KeyboardLayout as KeyboardLayoutFR
from keycode_win_fr import Keycode as KeycodeFR

rr = open("config.ini").read()
lines = [i for i in rr.split('#')]

_key = str(lines[0].split(':')[1]).lower()
kbd = Keyboard(usb_hid.devices)
if _key == "fr":
    layout = KeyboardLayoutFR(kbd)
    key_tag = KeycodeFR
else:
    layout = KeyboardLayoutUS(kbd)
    key_tag = Keycode

board_gpio = {
    'GP0': board.GP0, 'GP1': board.GP1, 'GP10': board.GP10, 'GP11': board.GP11,
    'GP12': board.GP12, 'GP13': board.GP13, 'GP14': board.GP14, 'GP15': board.GP15,
    'GP16': board.GP16, 'GP17': board.GP17, 'GP18': board.GP18, 'GP19': board.GP19,
    'GP2': board.GP2, 'GP20': board.GP20, 'GP21': board.GP21, 'GP22': board.GP22,
    'GP23': board.GP23, 'GP24': board.GP24, 'GP25': board.GP25, 'GP26': board.GP26,
    'GP27': board.GP27, 'GP28': board.GP28, 'GP3': board.GP3, 'GP4': board.GP4,
    'GP5': board.GP5, 'GP6': board.GP6, 'GP7': board.GP7, 'GP8': board.GP8, 'GP9': board.GP9
}

_led = str(lines[1].split(':')[1]).lower()
led = digitalio.DigitalInOut(board.LED if _led == "board" else board_gpio.get(_led.upper()))
led.direction = digitalio.Direction.OUTPUT

_switch = str(lines[2].split(':')[1]).lower()
switch_pin = board.GP1 if _switch == "default" else board_gpio.get(_switch.upper())
switch = digitalio.DigitalInOut(switch_pin)
switch.direction = digitalio.Direction.INPUT
switch.pull = digitalio.Pull.UP

docm = {
    **{chr(i): getattr(key_tag, chr(i)) for i in range(65, 91)},
    **{f'F{i}': getattr(key_tag, f'F{i}') for i in range(1, 13)},
    'SHIFT': key_tag.SHIFT, 'WINDOWS': key_tag.WINDOWS, 'MENU': key_tag.APPLICATION,
    'CTRL': key_tag.CONTROL, 'ALT': key_tag.ALT, 'GUI': key_tag.GUI,
    'LEFT': key_tag.LEFT_ARROW, 'RIGHTARROW': key_tag.RIGHT_ARROW, 'RIGHT': key_tag.RIGHT_ARROW,
    'DOWNARROW': key_tag.DOWN_ARROW, 'DOWN': key_tag.DOWN_ARROW, 'LEFTARROW': key_tag.LEFT_ARROW,
    'INSERT': key_tag.INSERT, 'NUMLOCK': key_tag.KEYPAD_NUMLOCK, 'PAGEUP': key_tag.PAGE_UP,
    'UPARROW': key_tag.UP_ARROW, 'UP': key_tag.UP_ARROW, 'BREAK': key_tag.PAUSE,
    'APP': key_tag.APPLICATION, 'END': key_tag.END, 'ESC': key_tag.ESCAPE,
    'ESCAPE': key_tag.ESCAPE, 'HOME': key_tag.HOME, 'PAUSE': key_tag.PAUSE,
    'CAPSLOCK': key_tag.CAPS_LOCK, 'DELETE': key_tag.DELETE, 'PAGEDOWN': key_tag.PAGE_DOWN,
    'PRINTSCREEN': key_tag.PRINT_SCREEN, 'ENTER': key_tag.ENTER, 'SCROLLLOCK': key_tag.SCROLL_LOCK,
    'SPACE': key_tag.SPACE, 'TAB': key_tag.TAB, 'BACKSPACE': key_tag.BACKSPACE,
}

def bled(state):
    led.value = state

def blink(times):
    for _ in range(times):
        bled(True)
        time.sleep(0.2)
        bled(False)
        time.sleep(0.2)

def press_keys(keys):
    if '+' in keys:
        key_list = [docm[key.upper()] for key in keys.split('+')]
        kbd.press(*key_list)
        kbd.release_all()
    else:
        kbd.send(docm[keys.upper()])

def execute_command(command, data):
    if command == "print":
        layout.write(data)
    elif command == "press":
        press_keys(data)
    elif command == "wait":
        time.sleep(int(data) / 1000)

def run_script():
    with open("syntax.txt") as file:
        lines = [line.strip() for line in file if line.strip()]

    for line in lines:
        cmd, _, data = line.partition(" ")
        execute_command(cmd.lower(), data)

while True:
    if not switch.value:
        blink(3)
        bled(True)
        run_script()
        break
    time.sleep(0.1)
Demonstration Video
📹 Watch the project in action: YouTube Short
Conclusion
This project showcases how the Raspberry Pi Pico can be repurposed as a USB Rubber Ducky, enabling penetration testers and cybersecurity enthusiasts to create and test payloads. Future enhancements could include GUI-based script generators, payload encryption, and multi-platform support.
Author
HAMZAOUI